Solving your first exercise
This guide will walk you through solving the “Variable Modification Challenge”, the first exercise in Hack The Chain. This is a simple exercise designed to get you familiar with the basics of interacting with smart contracts on the blockchain.
Note : This tutorial assumes the user has already set up Metamask and has some Sepolia ETH as explained in the setup guide.
Understanding the Challenge
Exercise Overview:
- Title: Variable Modification Challenge
- Difficulty: Easy
- Objective: Change the value of the
storedDatavariable from its initial value (0) to any other value.
The Contract Code:
  // SPDX-License-Identifier: MIT
pragma solidity ^0.8.0;

contract SimpleStorage {
    uint256 private storedData;
    address public owner;

    constructor() {
        storedData = 0;
        owner = msg.sender;
    }

    function setVariable(uint256 x) public {
        storedData = x;
    }

    function getVariable() public view returns (uint256) {
        return storedData;
    }
}
How the Verification Works:
The platform will check if you’ve successfully modified the storedData variable by calling the getVariable() function and verifying that its value is greater than 0.
Solving with Remix IDE
Remix is a popular web-based IDE for Solidity development. Here’s how to solve the exercise using Remix:
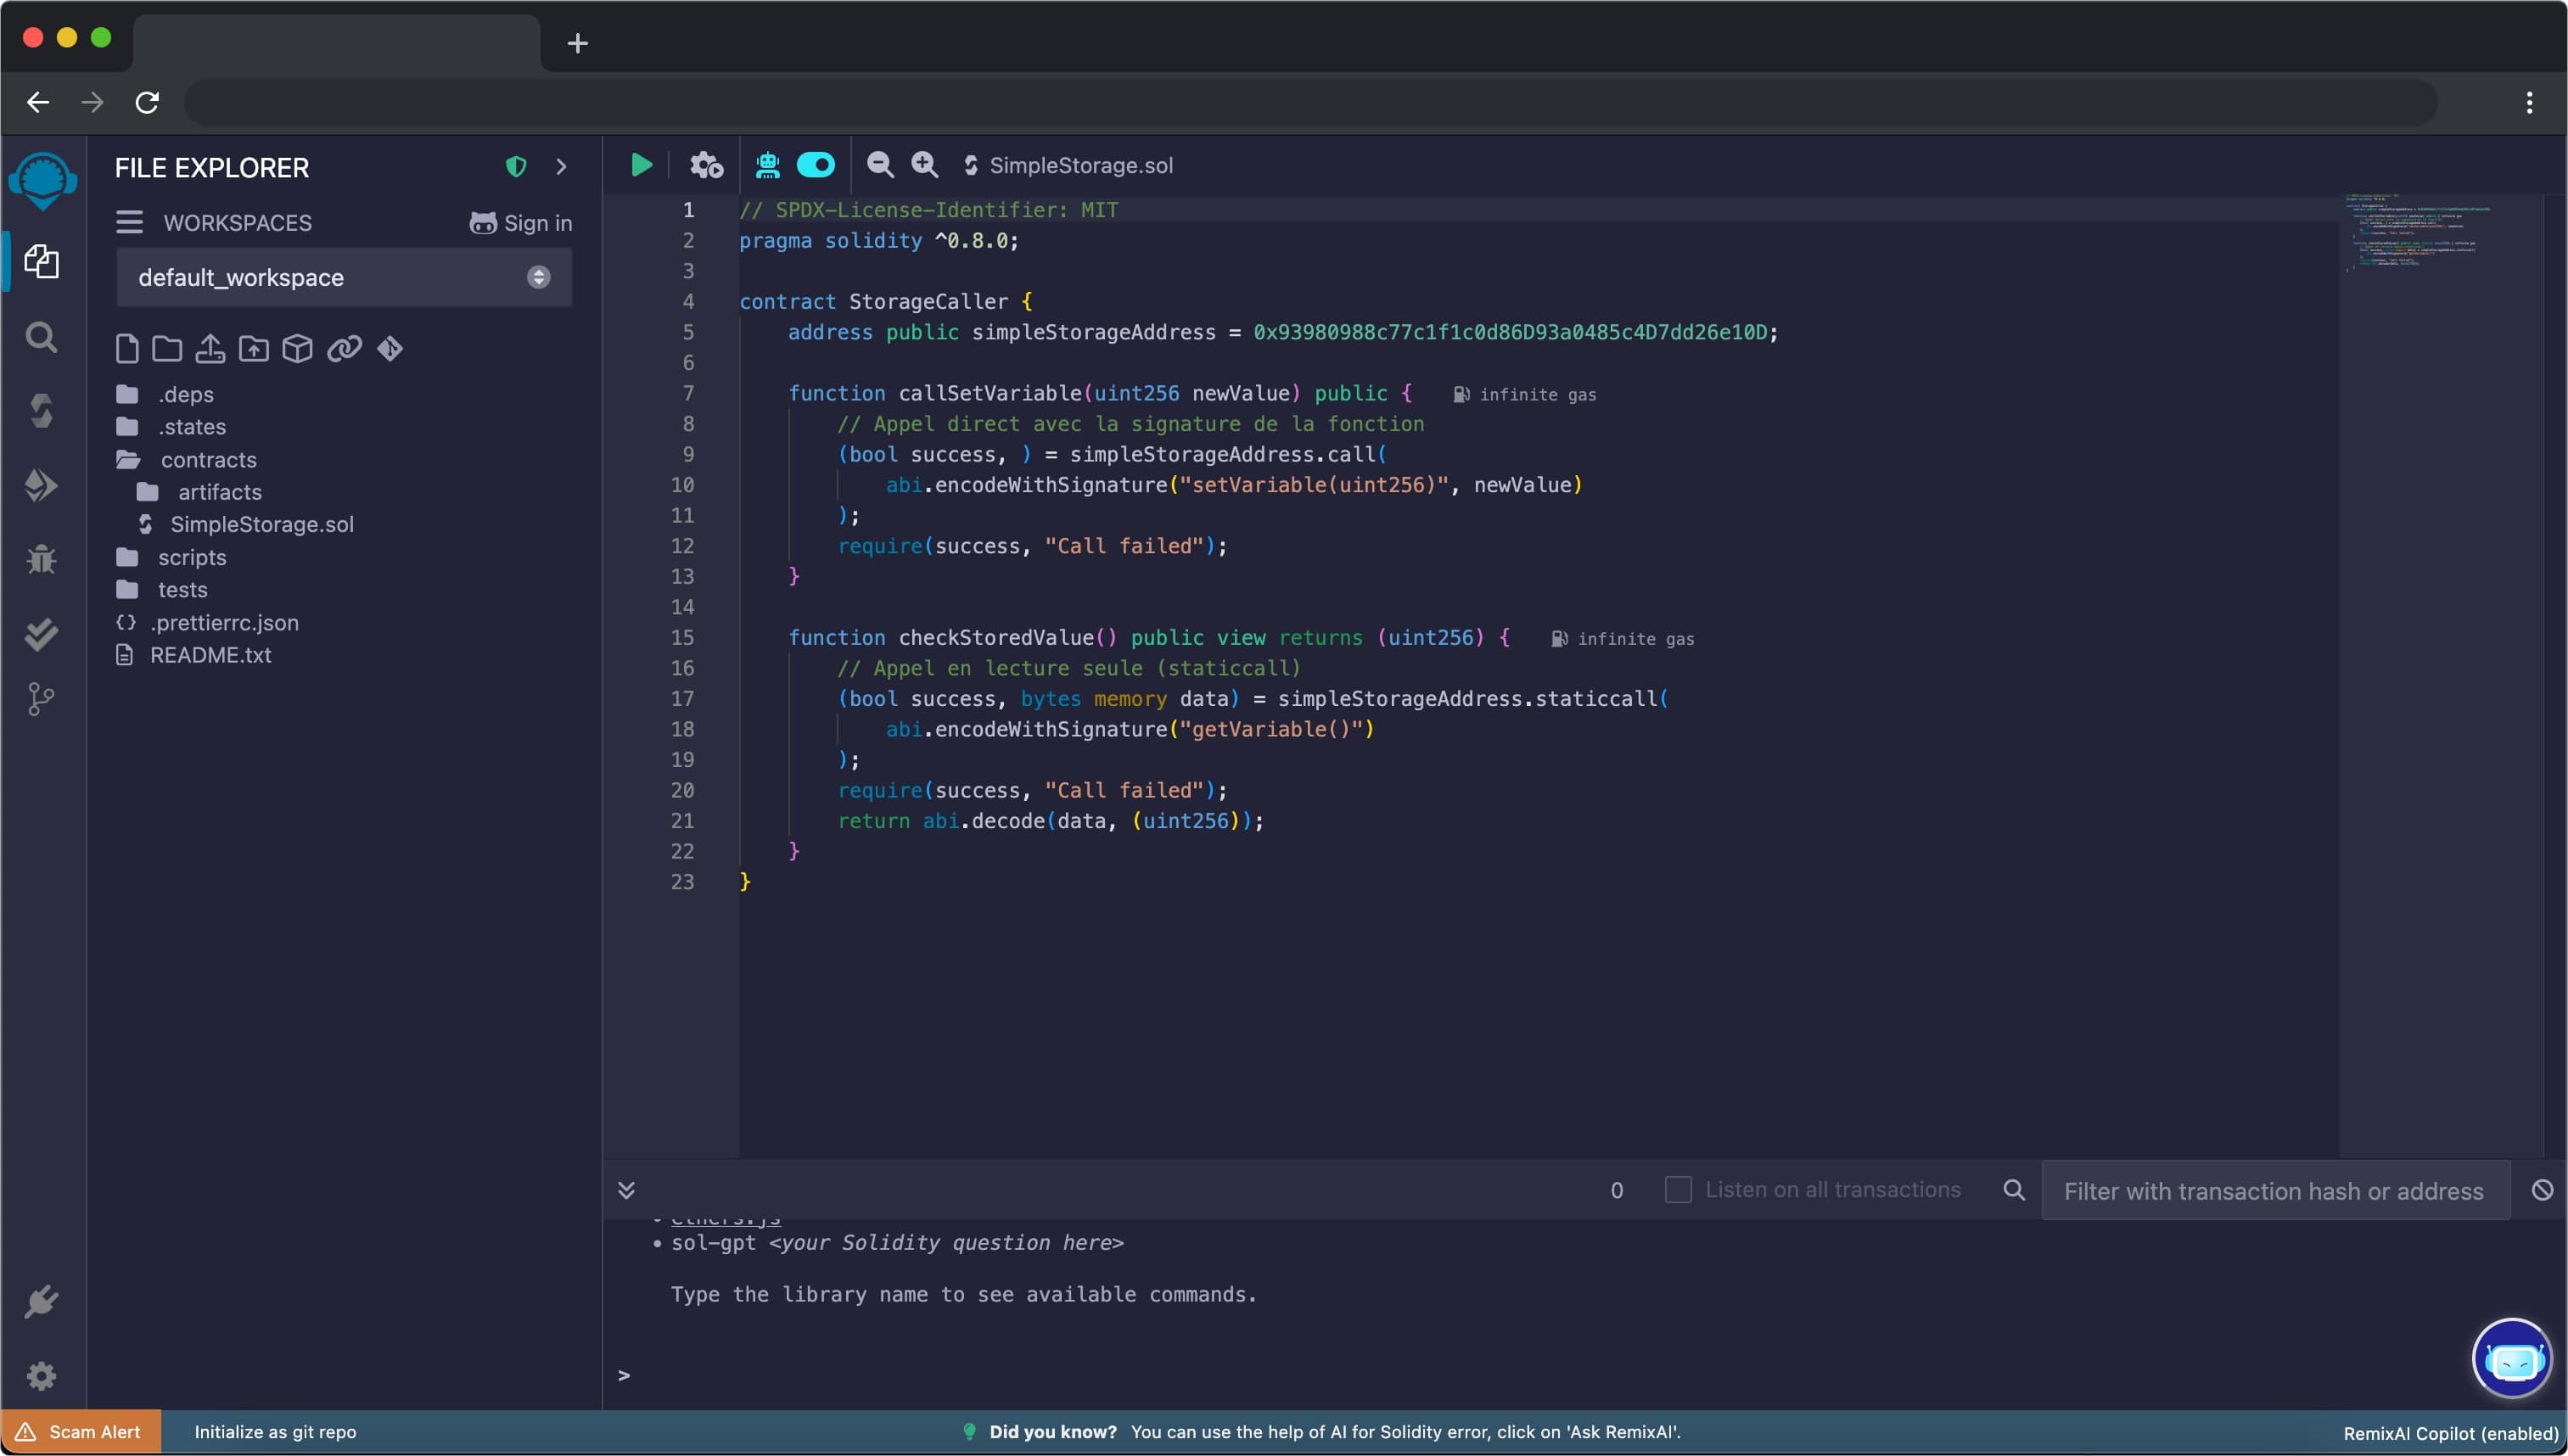
Step 1: Set Up Remix
- Open Remix IDE
- Create a new file called
SimpleStorage.solin thecontractsfolder. - Copy and paste the contract code provided above into your new file
  // SPDX-License-Identifier: MIT
pragma solidity ^0.8.0;

contract StorageCaller {
    // ADDRESS OBTAINED AFTER CONTRACT DEPLOYMENT
    address public simpleStorageAddress = 0x93980988c77c1f1c0d86D93a0485c4D7dd26e10D;

    function callSetVariable(uint256 newValue) public {
        // Direct call with function signature
        (bool success, ) = simpleStorageAddress.call(
            abi.encodeWithSignature("setVariable(uint256)", newValue)
        );
        require(success, "Call failed");
    }

    function checkStoredValue() public view returns (uint256) {
        // Read-only call (staticcall)
        (bool success, bytes memory data) = simpleStorageAddress.staticcall(
            abi.encodeWithSignature("getVariable()")
        );
        require(success, "Call failed");
        return abi.decode(data, (uint256));
    }
}
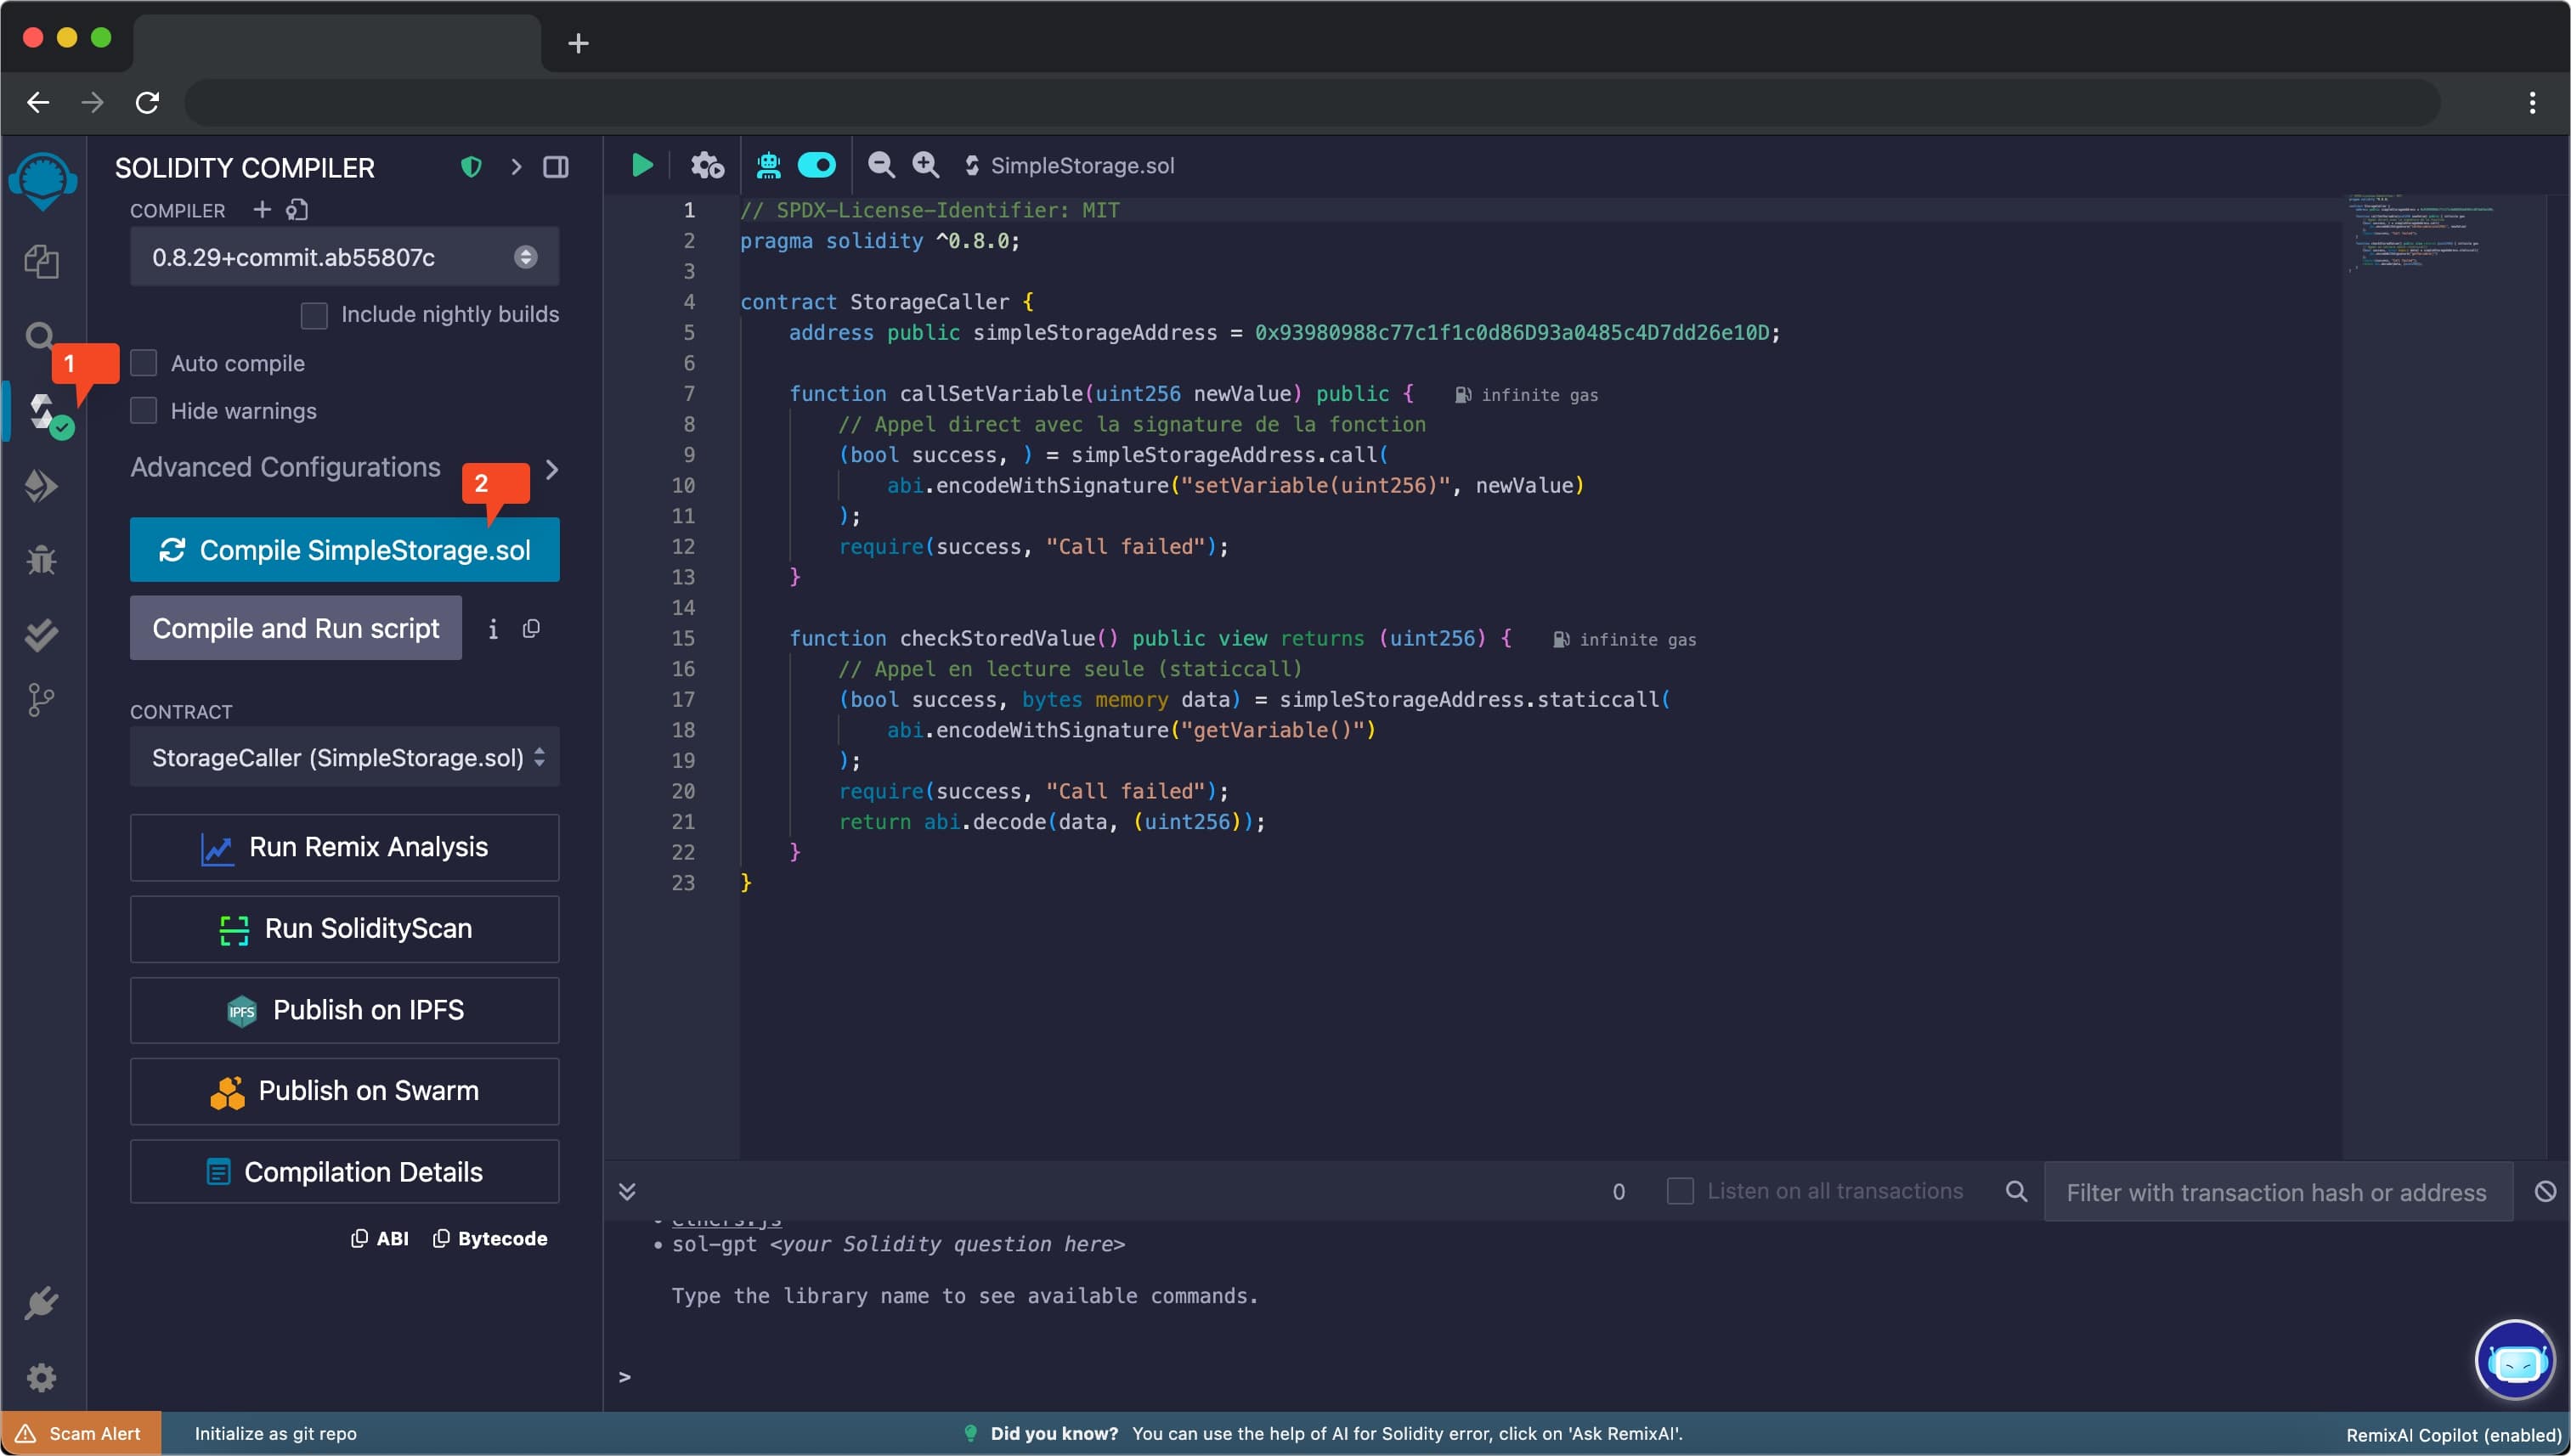
Step 2: Compile the Contract
- Click on the “Solidity Compiler” tab in the left sidebar
- Ensure that the compiler version is set to at least 0.8.0
- Click “Compile SimpleStorage.sol”
- Verify that there are no errors in the compilation output
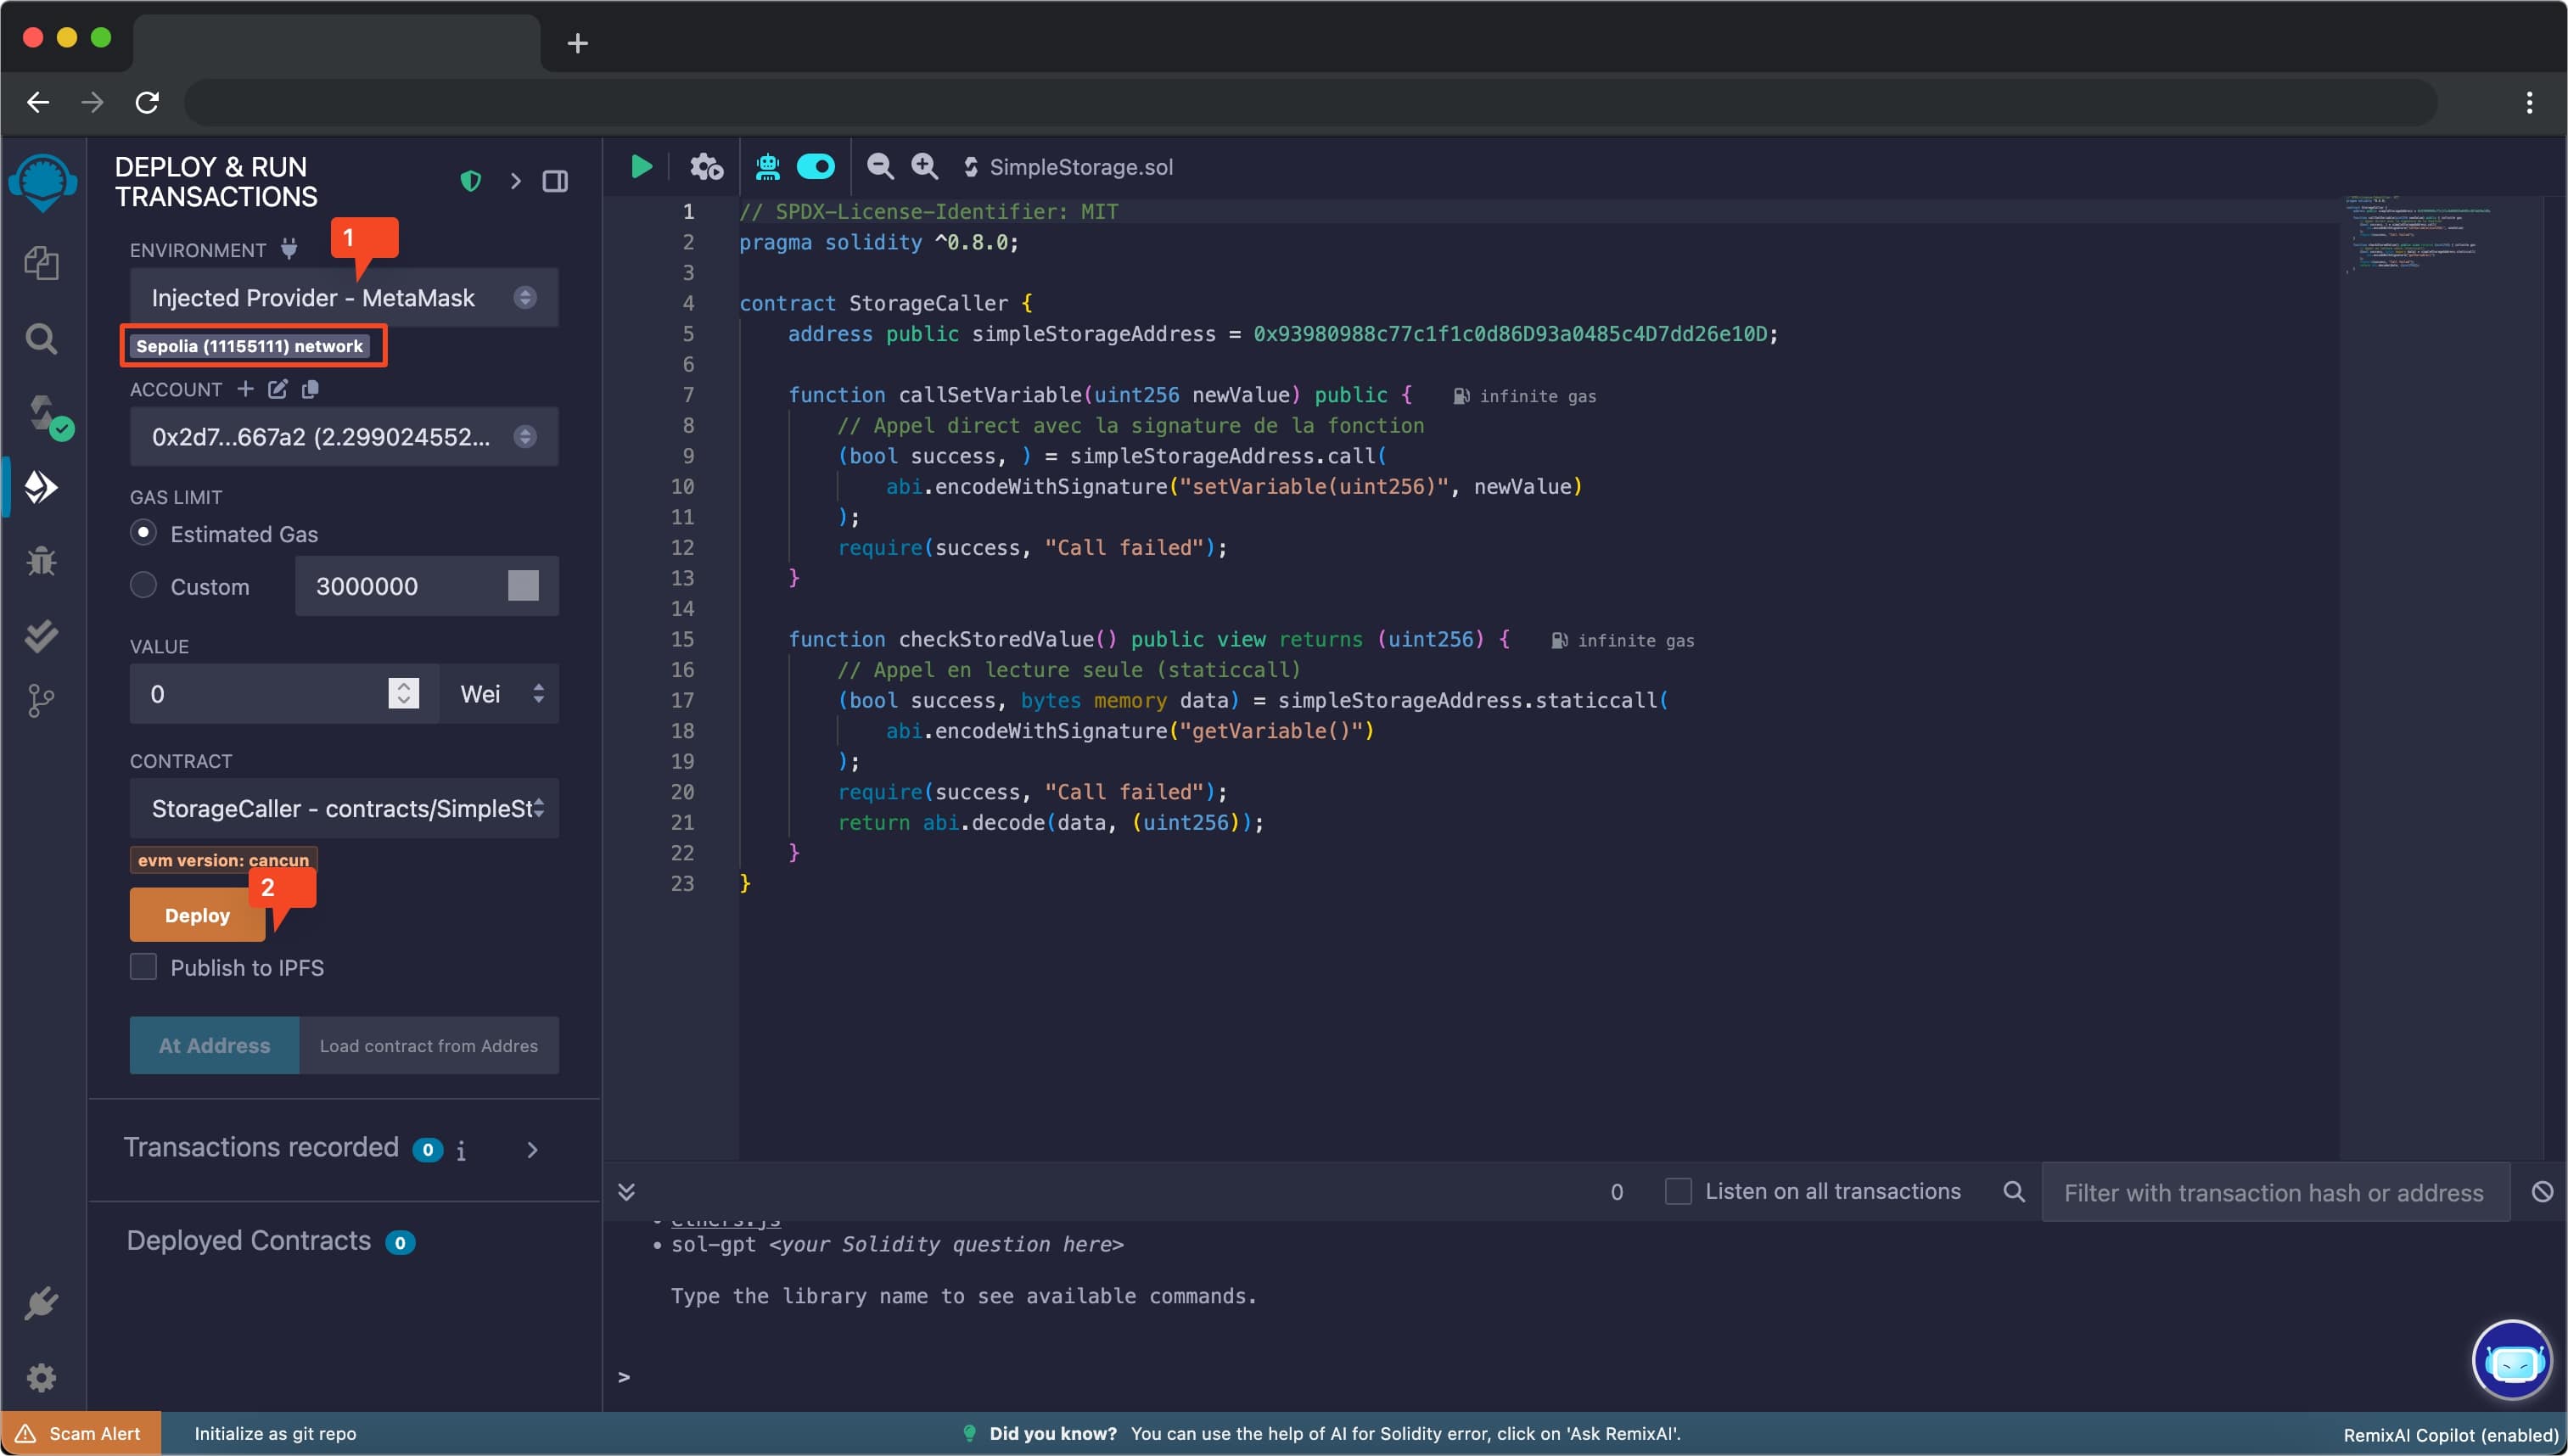
Step 3: Deploy to Sepolia Testnet
- Click on the “Deploy & Run Transactions” tab in the left sidebar
- Change the environment dropdown to “Injected Provider - MetaMask”
- Ensure your MetaMask is connected to Sepolia Testnet
- Click “Deploy”
- Confirm the transaction in the MetaMask popup
- Wait for the transaction to be confirmed on the blockchain
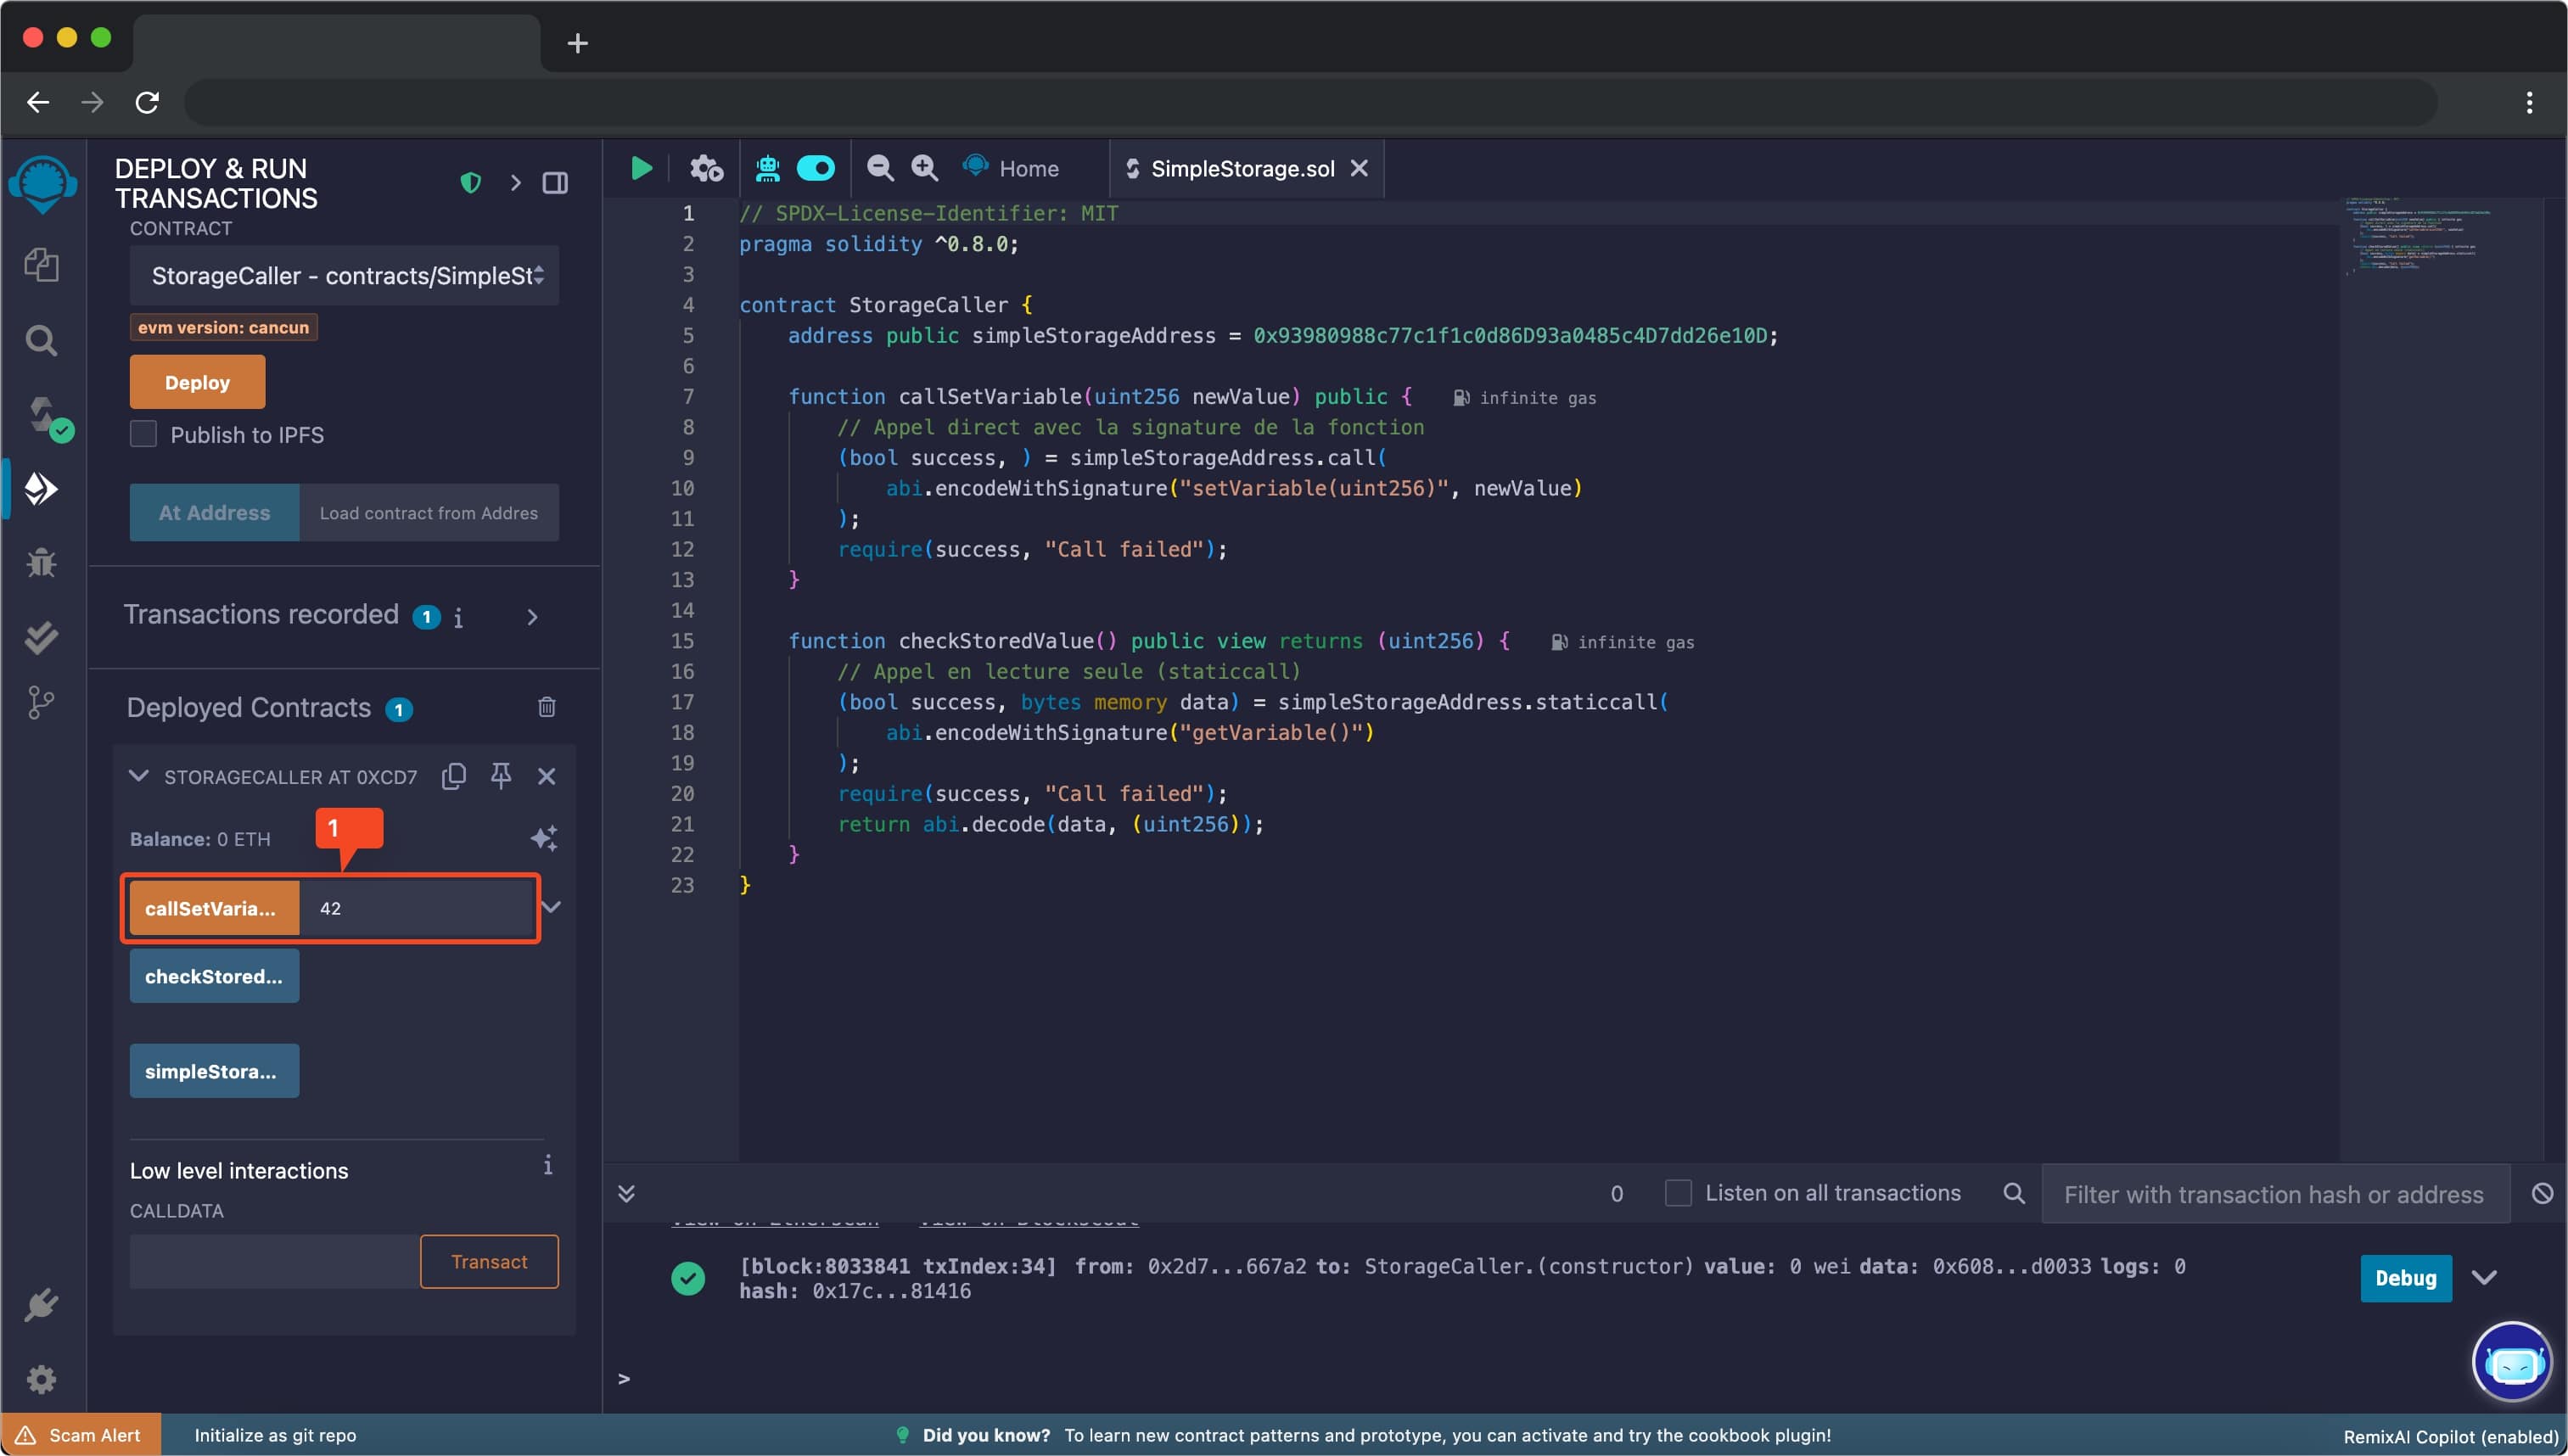
Step 4: Interact with the Contract
- Once deployed, the contract will appear under the “Deployed Contracts” section
- Expand the contract to see its functions
- Find the
callSetVariablefunction - Enter a value greater than 0 (e.g., 42) in the input field
- Click the “transact” button
- Confirm the transaction in MetaMask
- Wait for the transaction to be confirmed
Step 5: Verify the Change
- Find the
checkStoredValuefunction under the deployed contract - Click the “call” button (blue button)
- Verify that the returned value is the one you set (e.g., 42)
Step 6: Complete the Exercise
- Return to the Smart Contract Auditing platform
- Enter the deployed contract address
- Click “Check Exploit”
- The platform should indicate that you’ve successfully solved the exercise
Solving with Foundry (Local Development)
Foundry is a powerful Ethereum development toolkit for more advanced development. Here’s how to solve the exercise using Foundry:
Step 1: Install Foundry
If you haven’t installed Foundry yet, run:
  curl -L https://foundry.paradigm.xyz | bash
foundryup
Step 2: Create a New Project
  mkdir variable-modification
cd variable-modification
forge init
Step 3: Create the Contract File
Create a new file at src/SimpleStorage.sol and add the contract code:
  // SPDX-License-Identifier: MIT
pragma solidity ^0.8.0;

contract SimpleStorage {
    uint256 private storedData;
    address public owner;

    constructor() {
        storedData = 0;
        owner = msg.sender;
    }

    function setVariable(uint256 x) public {
        storedData = x;
    }

    function getVariable() public view returns (uint256) {
        return storedData;
    }
}
Step 4: Create a Deployment Script
Create a new file at script/Deploy.s.sol:
  // SPDX-License-Identifier: MIT
pragma solidity ^0.8.0;

import "forge-std/Script.sol";
import "../src/SimpleStorage.sol";

contract DeployScript is Script {
    function run() external {
        uint256 deployerPrivateKey = vm.envUint("PRIVATE_KEY");

        vm.startBroadcast(deployerPrivateKey);

        new SimpleStorage();

        vm.stopBroadcast();
    }
}
Step 5: Create an Interaction Script
Create a new file at script/Interact.s.sol:
  // SPDX-License-Identifier: MIT
pragma solidity ^0.8.0;

import "forge-std/Script.sol";
import "../src/SimpleStorage.sol";

contract InteractScript is Script {
    function run() external {
        uint256 deployerPrivateKey = vm.envUint("PRIVATE_KEY");
        address contractAddress = vm.envAddress("CONTRACT_ADDRESS");

        vm.startBroadcast(deployerPrivateKey);

        SimpleStorage simpleStorage = SimpleStorage(contractAddress);

        // Set the variable to 42
        simpleStorage.setVariable(42);

        // Verify the change
        uint256 value = simpleStorage.getVariable();
        console.log("New value:", value);

        vm.stopBroadcast();
    }
}
Step 6: Set Up Environment Variables
Create a .env file:
  // Prefix your metamask private key with `0x`
PRIVATE_KEY="your_private_key_here"

// You can use "https://sepolia.drpc.org"
//   > https://rpc.info/ethereum-sepolia
SEPOLIA_RPC_URL="your_sepolia_rpc_url_here"

// Needed only if you use `--verify` on step 7
ETHERSCAN_API_KEY="etherscan_api_key"
Important security note: Never commit your private key to version control!
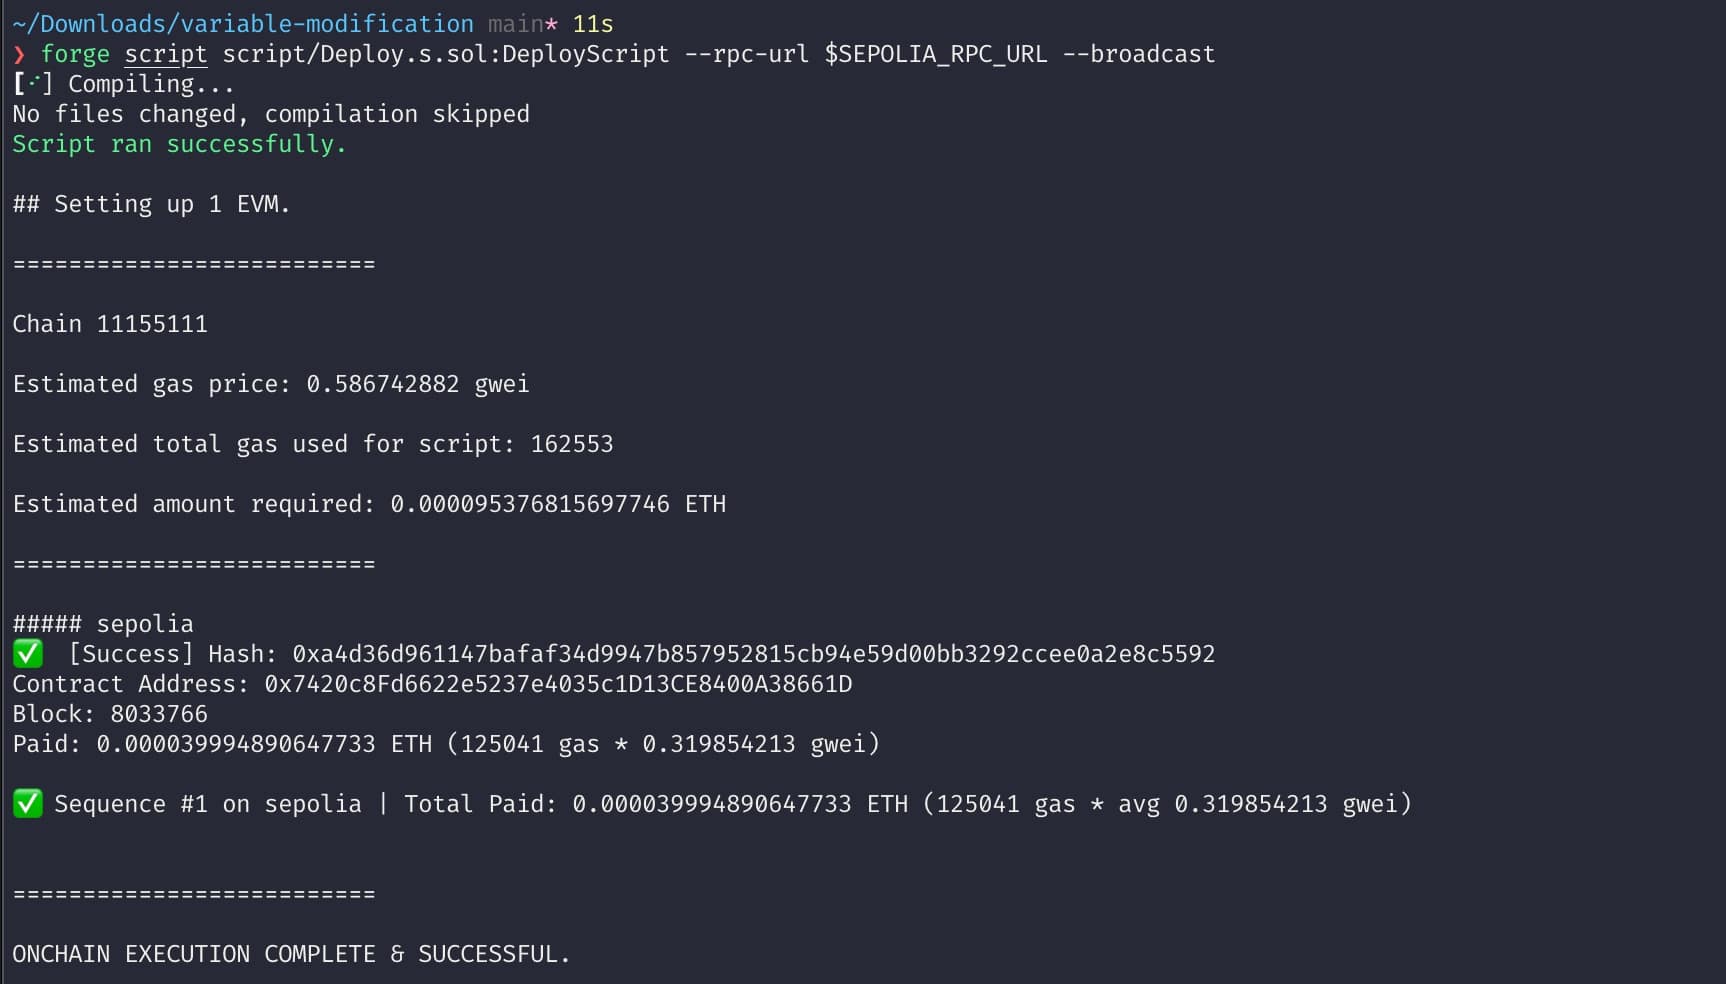
Step 7: Deploy the Contract
  source .env
forge script script/Deploy.s.sol:DeployScript --rpc-url $SEPOLIA_RPC_URL --broadcast --verify
Step 8: Interact with the Contract
Set the contract address in your environment variables:
  // The value of the target contract deployed from the site
export CONTRACT_ADDRESS=the_target_contract_address
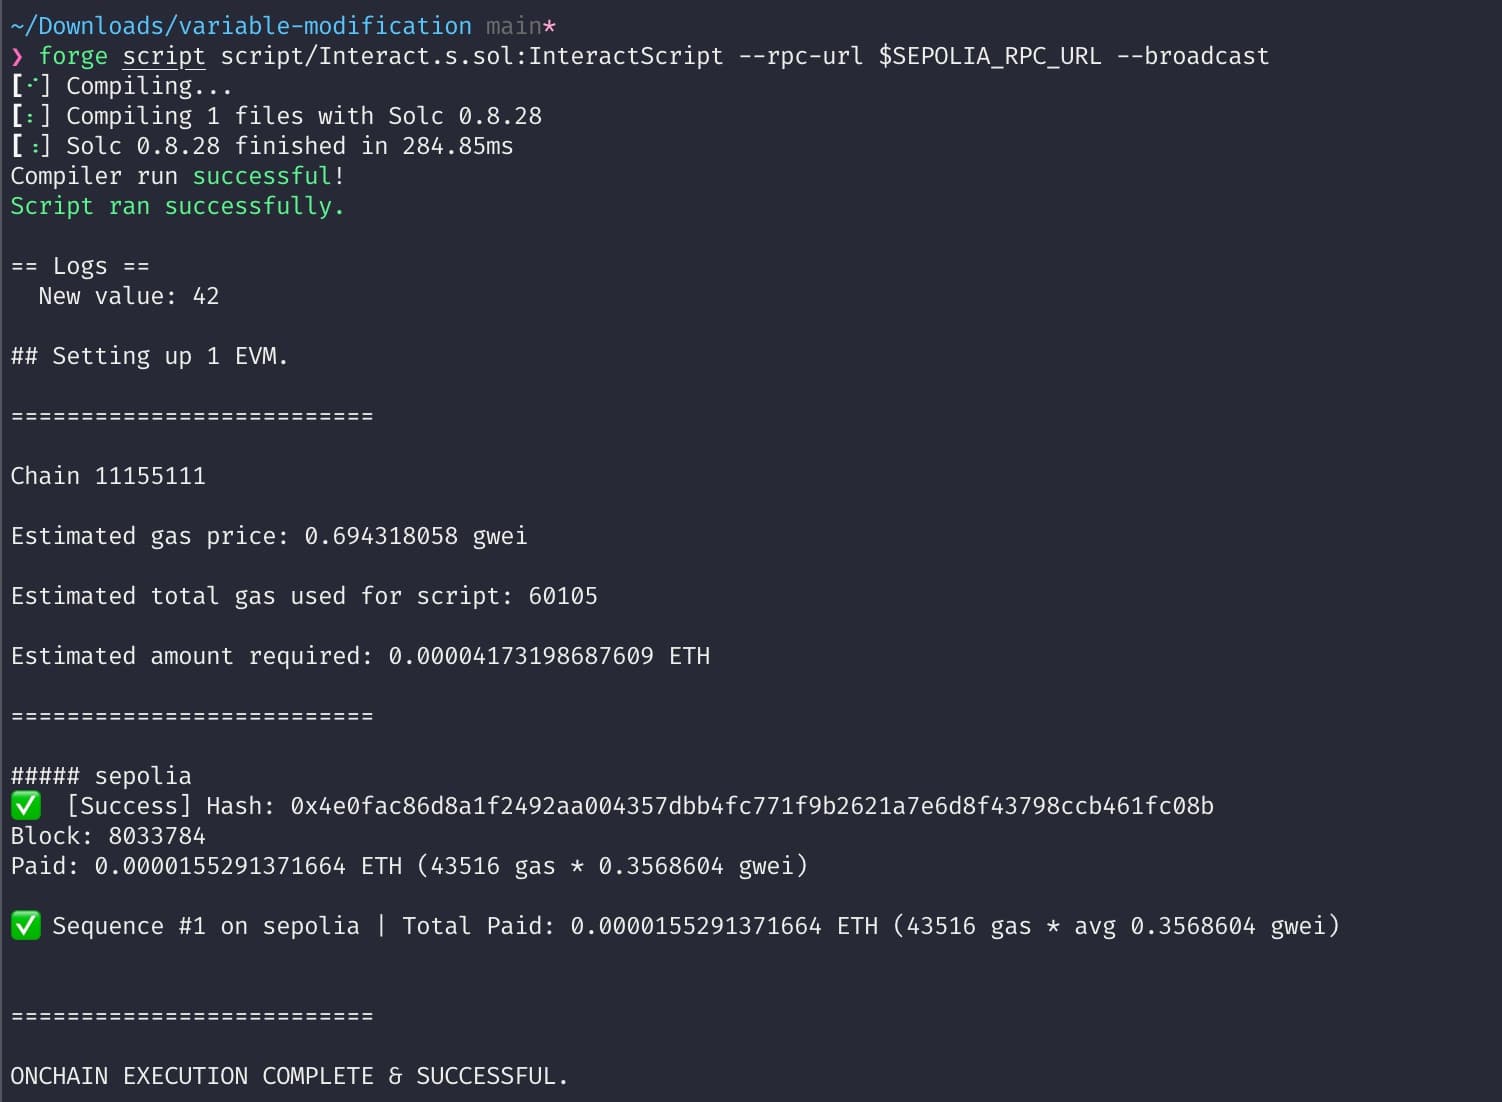
Then run the interaction script:
forge script script/Interact.s.sol:InteractScript --rpc-url $SEPOLIA_RPC_URL --broadcast
Step 9: Complete the Exercise
- Return to the Smart Contract Auditing platform
- Enter the deployed contract address
- Click “Check Exploit”
- The platform should indicate that you’ve successfully solved the exercise
Understanding What You Did
In this exercise, you:
- Deployed a simple smart contract with a state variable
storedDatainitialized to 0 - Called the
setVariablefunction to change that value to something non-zero - Verified the change was successful by checking the return value of
getVariable
While this is a very simple exercise, it teaches the fundamental concept of modifying state in a blockchain. In more complex exercises and real-world scenarios, understanding how to modify state is crucial for both legitimate interactions and potential exploits.
Next Steps
Now that you’ve completed your first exercise, consider trying more challenging exercises to learn !
Each exercise builds on your knowledge and prepares you for real-world smart contract auditing.
Last updated 05 Apr 2025, 21:42 +0200 .